Saturday, July 10, 2010

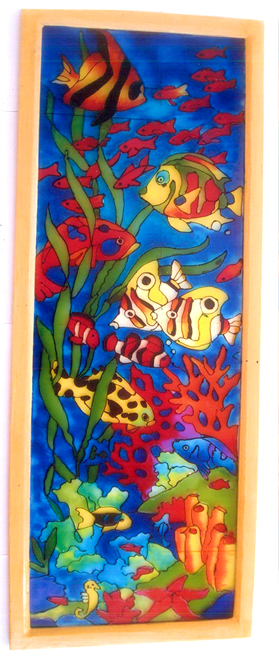
Oceanview Window Craft Photo

See a picture of a unique craft project


"My own idea for a stained glass window using glass beads, sea glass, glass glue, an old window, and some imagination."

One word: FABULOUS!

If you are enjoying reading this blog,Share it on Facebook, Twitter, Buzz or Reddit.

How to Depict a Glass in a Painting

Depicting a glass in a painting is good practice in shifting your brain function from the left, logical brain into your right, artistic side. Glasses are often clear, and so they are influenced by the colors in, around and behind them. Reflections and distortions occur because of this; keep your subject simple as you begin your first paintings. Any painting medium can be used to experiment with this technique. Choose colors that are closest to the subject you'll be painting.


Instructions 

Step
1

Find a glass that has a distinctive shape. Choose a colored glass, or a clear one that contains some liquid. Keep in mind that square or rectangular objects are easier to depict, because they have more delineated edges than round objects.
Step
2

Draw the outline of the glass object you want to paint, using a pencil.
Step
3

Simplify the colors you see reflected in the glass. The shapes within the glass will follow the general shape of the object; a long, tall glass will produce areas of long, tall color changes. The same is true of other shapes.
Step
4

Paint the first few strokes darker than the background. Give color to the area of the glass that is thickest.
Step
5

Proceed to add colors where you see them, going from dark to light. Keep your painting as simple as possible. Do not belabor one spot, but keep moving and painting what you see. Do not think in terms of an object, but rather in terms of shapes and colors; represent these as faithfully as you can.
Step
6

Use complementary colors juxtaposed next to each other, when possible. These are colors that fall opposite each other on a color wheel.
Step
7

Add the lightest highlights last. If they appear fuzzy to you, then paint them as you view them.
 

If you are enjoying reading this blog,Share it on Facebook, Twitter, Buzz or Reddit.

How to Reverse Paint a Snowmen on Glass

Ready to try something new and fun with paint? This is a great project for the upcoming holiday's. Everyone will enjoy those home made treats when they are served up on this adorable hand painted glass plate. All it takes is a little "reverse know how!"


 Instructions


step
1
Begin with a clear glass plate. Place the plate face up on a table in front of you. Take a dry erase marker and draw your pattern on to the plate. Snowmen are easy because they are drawn as circles. Draw arms and make circles for the mouth, buttons and eyes. You can draw a scarf if you wish. Don't forget some snowmen wear a hat, so draw a hat too!
Step
2

Flip the plate over. The trick to painting a reverse scene is to do it all backwards, so what you would normally paint last, you will be painting first. Begin with the small details (Color: black/hat,eyes, buttons, scarf, Color: orange/nose. Wait and let dry.
Step
3

Paint the body of the snowman white. This is done making circles with your paint brush over the body you have drawn. Let it dry. You can use a little blue in your white paint to highlight. Let dry
Step
4

Cut a small 1 inch piece of sponge and dab it with white paint. Wet sponge first to get it soft. Dab sponge all around the outer rim of the plate for a snow effect. Next dab your sponge in a blue paint and dab the entire back of the plate. Let dry. You can leave it just like this or after it dries you can paint the back of the plate with a gold paint. Wait and let dry.
Step
5

Flip plate over and wipe off dry erase pen marks. Serve a warm delicious holiday treat on the plate and enjoy.

If you are enjoying reading this blog,Share it on Facebook, Twitter, Buzz or Reddit.

Instructions for Reverse Painting on Glass

Reverse painting on glass is a type of painting where the object being painted is transparent and the image is intended to be viewed from the opposite or reverse side. If you were inside a home and decided to paint on a window, you could make a reverse painting intended to be viewed from the outside of the house. In this type of painting you paint the objects closest to the viewer first and the objects in the distance last.

 Instructions

Step
1

Select sheet glass the size you wish to paint. Often these types of paintings are done on glass purchased as part of a frame kit. This makes it easy to hang the paintings later.
Step
2

Find a pattern or design you wish to paint. Freehand a design on paper to the correct glass size or select a design from a printed calendar, photograph or other image. You can have images enlarged to the right size at most copy stores.
Step
3

Tape your sketch, copy or print on your work surface. Place your glass over your print and tape the glass completely to the work surface. By taping all of the glass edges you keep the sharp edge of the glass from scraping at your wrist while you work.
Step
4

Draw the main elements of your design using liquid lead. This is a type of thick paint that gives the appearance of stained glass leading. This paint will also constrain the flow of your paints on the surface of the glass, which is often helpful for beginning experiments in this art form. Use toothpicks and cotton swabs to pull the lead into fine lines for detail work. Allow your liquid lead two to four hours drying time.
Step
5

Paint the shadows and highlights on clothing and faces first. The order of painting is from shadows to highlights to object color to background and sky. As you paint you will be covering up your foreground detail, which can be disconcerting.
Step
6

Allow each layer of paint to dry completely. When using oil paints on glass, the oil will take time to dry. If you try to add on the next layer too quickly you will smear the layer below. For faster drying times try acrylic paints.

If you are enjoying reading this blog,Share it on Facebook, Twitter, Buzz or Reddit.

Thursday, July 8, 2010

Lighthouse Glass Painting

Lighthouse Glass Painting


If you are enjoying reading this blog,Share it on Facebook, Twitter, Buzz or Reddit.

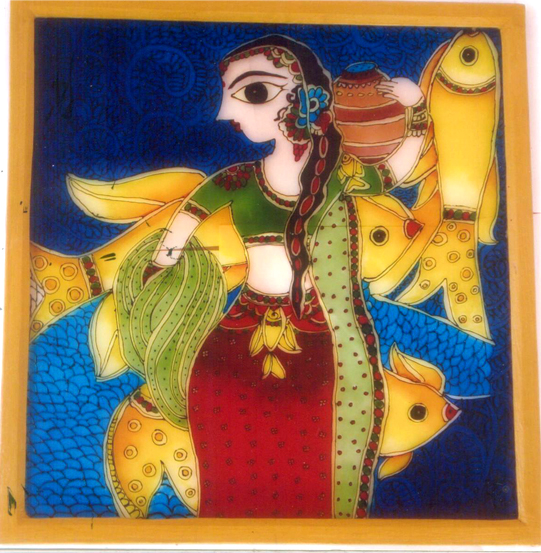
Girl Glass Painting

Girl Glass Painting

If you are enjoying reading this blog,Share it on Facebook, Twitter, Buzz or Reddit.

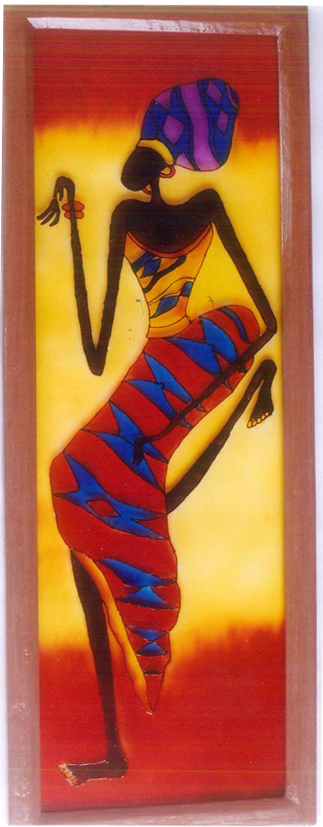
African Glass Painting

African Glass Painting

If you are enjoying reading this blog,Share it on Facebook, Twitter, Buzz or Reddit.


About Painting:
Glass painting made its appearance in India in the late 18th and early 19th century. The technique was adopted by the local painters who depicted popular stories, epic themes, icons, portraits, and icons through the glass paintings. The glass painters combined both traditional and European themes. The symbolic depiction of Indian gods and goddesses were produced. Till today, in some parts of India especially in Gujarat and South India, glass paintings are produced carrying both popular and folk art traditions. Craft in India has a fascinating collection of glass painting. Executed brilliantly on fine quality glass are these colorful and vibrant paintings. They are revered as fine works of art, and can be collected from our gallery to decorate your home.

If you are enjoying reading this blog,Share it on Facebook, Twitter, Buzz or Reddit.

18 diagonal square of Fused Glass

18 diagonal square of Fused Glass


Description
18" square of white opal fusing glass was stacked with turquoise ,amber,colbalt,and black glass. Red/orange and orange frit was used to fill in the spaces. Then clear glass pieces were laid over the entire  piece and black powder was brushed to enhance and give dimension it.  The finished piece  will be hung on the wall diagonally.


If you are enjoying reading this blog,Share it on Facebook, Twitter, Buzz or Reddit.

Wednesday, July 7, 2010

Stained Glass Patterns and Tips

Beautiful Mosaic Cat

This inspires me to try mosaics next. This mosaic cat is a wonderful example of the versatility of this medium.
It is interesting that shades of purple and blue, lime green, and white can be combined to make a very realistic picture of a cat. A good choice of grout color makes all the difference, too.


And here is the rest of it.

If you are enjoying reading this blog,Share it on Facebook, Twitter, Buzz or Reddit.

Tuesday, July 6, 2010

Original Hand Painted Glass

 Original Hand Painted Glass
Inspired by the vibrant colors in nature, these translucent paintings on glass are created by building multiple layers of colorsEach piece is signed and then heating bonds the painting to the glass
  1.  
  2. Purple Grapes with Fruit Pitcher 
  3.  
  4. Irises Champagne Flute 

If you are enjoying reading this blog,Share it on Facebook, Twitter, Buzz or Reddit.

The indian Glass Paintings

The art of glass painting appeared in India in the late 18th and early 19th century. Europe was well acquainted with the technique from the Middle Ages.The Chinese artists learnt the art from Europe and produced the creation on the 'back of the material' with the details and shadows first and the large areas of color later. These productions were mainly for the export market of Europe.The flourishing trade relations between East India Company and China brought this art to India. The Chinese artists s patronized by the royalty at Mysore, Satara, and Kutch also contributed to the body of work.
The technique was adopted by the local painters who depicted popular stories, epic themes, icons, portraits, and icons on the glass paintings. Regional variations were also conspicuous in the paintings produced in Tamil Nadu, Karnataka, Andhra Pradesh, Kerala, Kutch, Gujarat, Rajasthan, Awadh, New Delhi, Bihar, Bengal, Deccan, Satara, Hyderabad and Bombay.


Glass PaintingsThe glass was imported in India from Britain and Belgium. Though India herself had a rich tradition of producing glass till the 16th century. However, the art became inferior in course of time.
The artists produced works, which combined both traditional and European themes. The portraits or copies of European works as well as the symbolic representation of gods and goddesses were produced. Till today, in some parts of India especially in Gujarat and South India glass paintings are still produced carrying the both popular and folk art traditions.

If you are enjoying reading this blog,Share it on Facebook, Twitter, Buzz or Reddit.

Here is the beginning of post. And here is the rest of it.

If you are enjoying reading this blog,Share it on Facebook, Twitter, Buzz or Reddit.

Monday, July 5, 2010

Glass Sketch Class Preview

A quick look at the Glass Sketch technique taught by Bullseye Glass. Even students who are nervous about drawing enjoy this class because sketching on sheet glass with glass powders and frits is not like working with traditional mediums. In some ways, it's a far more fluid and forgiving technique—one that can inspire an incredible range of expression.

If you are enjoying reading this blog,Share it on Facebook, Twitter, Buzz or Reddit.

Glass Painting Techniques

Additional brush and paint application techniques for adding paint to your glass painting project

If you are enjoying reading this blog,Share it on Facebook, Twitter, Buzz or Reddit.

Sunday, July 4, 2010

traditional glass painting

If you are enjoying reading this blog,Share it on Facebook, Twitter, Buzz or Reddit.

Glass Painting Designs


Glass painting is a real delight to eyes. Undoubtedly, when glass painting is combined with an innovative home decor idea, it can create amazing works of art. The art of glass painting is gradually taking pace especially among those who are actually interested in decorating their homes with an artistic touch. In fact, glass painting craft is not a tough job to do but what matters is- the glass painting design. Designs should be such that they should appeal to the viewer at once and must go with the type of glass that has been taken for painting. And if you are not aware of the glass painting designs then the option of templates is always there. Here are some of the options that can be considered for your glass painting designs for an aesthetic home decor.

Firstly, different geometrical shapes can be incorporated on a stained glass to add creativity to a simple piece of glass. Further, these shapes can be painted with different colors to give the entire piece an attractive look. It is really simple to do and will surely catch the attention of your guests.

Colorful trim is another glass painting design that adds an artistic accent to a dull looking window. A thin and colorful design painted around the edges of a small looking window will surely beautify the entire looks of that particular window.

Glass Painting Designs


Black outliner glasspainting design forms the outliner, minimum of two inch squares around the edges of the window. The outliner paint is thicker than normal glass paint and glass painting design. It actually creates a raised boarder around a painted design. Assorted semi-opaque glass paints fill the squares to exhibit more of contemporary look to the entire glass painting craft.

Seasonal decorations work best as glass painting designs. Actually any of the craft paints which is artistically and neatly painted will work great as a seasonal painting on a glass window. An elegant fall decoration can also be presented by using glittery gold, bronze and copper paint forms leaves scattered randomly across a large window. Similarly, icy decoration can also be presented by using sparkling silver and white glass paint forms to form delicate snowflakes around the edges of a glass window.

To paint glass baubles is another creative art. They can be painted in many artistic ways. The top portion of the baubles can easily be removed and so you can decorate ornaments from inside. If you slowly thin down some paint and drip some into the glass bauble, you can gently swirl it around to coat the glass from the inner side for a decorative swirled effect. You can always use several combinations of colors to paint in order to make them blend properly with the glass painting designs.

So, try these glass painting ideas and feel the difference in the entire decor of your home.

If you are enjoying reading this blog,Share it on Facebook, Twitter, Buzz or Reddit.

Glass painting?


Glass painting is a kind of drawing painted on the inside surface of transparent glass, executed with oil and hard resin or with watercolor and gum on glass sheets. Also known as reverse glass painting, engravings are laid down on the back of the glass, and painted from the reverse. The effect is one of stunning clarity and rich color ideally serving as a connoisseur's delight.

Major types of traditional stained glass paints are: vinegar trace paint, matt paint, silver stain, and oil-based paints. The process of glass painting usually starts with etching a full size working drawing. Using this drawing as a template, the glass is selected and cut, and each piece of glass is individually painted using glass paint. The paint is then fired into the surface by heating the glass to approximately 650° centigrade in a furnace. When all of the glass has been painted it is assembled into lead panels.

Glass painting has been a folk art tradition in Europe and North America and, from the 15th to the 18th century, and were regarded as a fine art in northern Europe, where they have been more recently revived. Traditionally stained glass painting referred to painting on the surface of a sheet of glass to be included in a stained glass work. This kind of painting, which is actually closer to drawing than painting, was done to add details such as faces and folds of clothing that couldn't be added with traditional lead lines. Glass painting was also used to cover up portions of stained glass works so that light was kept from shining through. As the 19th century progressed there was a revival of interest in the Gothic arts and the majority of designers reverted to the medieval techniques of producing mosaic stained glass, leading off separate colors. Different glass painting techniques and effects were employed within these various design styles, and were generally reliant on the media with which the paint was mixed. There have been several innovations since then, particularly in techniques of glass painting, which have both enriched and added to the variety and designs of stained glass that can be appreciated today.
Glass painting allows an expressive mix of form and dimension to be added to glass. Painters today coming up with fused elements in their paintings and offer contemporary glass painting designs on a variety of topics. Decorated with a blend of sparkling light, the beauty of a glass painting is par excellence.

If you are enjoying reading this blog,Share it on Facebook, Twitter, Buzz or Reddit.

How to Make Your Own Stained Glass Windows

he 5 C Approach of Stained Glass Window Making
Create or purchase a pattern for your stained glass windows.

You need: paper, pencil, copier, scissors OR preprinted pattern
If you decide to design your own stained glass windows, use a piece of paper that is the same size as the window you will be crafting. Beginners will do well to avoid drawing small pieces and instead opt for larger ones. Advanced crafters will enjoy the added level of difficulty small pieces present. Make a copy of the draft, and then use the copy to cut out the individual pieces, being careful to number them. On the original, place a corresponding number in the field that you cut out of the copy.

Carefully pick out the glass which you will use.

You need: sheets of colored glass, removable adhesive OR bits and pieces of waste glass, removable adhesive

Select the glass for your stained glass windows with an eye on color but also on thickness. If the glass is too thin, it will be brittle and may not withstand the pressure you put on it; if it is too thick, it will make your task unduly hard.

Place the portions of your pattern over the glass as desired; if you are working with bits and pieces of waste glass, it is important that no fissures or cracks are present that may enter into the design. Use the adhesive to place the pattern piece in place.

Cut the glass.

You need: glass cutter, glass grinder, pliers, emery paper

For beginners this is perhaps the most feared aspect of the process. The indicated shapes are cut out of the sheet glass with a glass cutter. Do not try to redo the cut if at first even if it looks like you might have kept a bit too much of the material in place. Instead, gently tap the finished shape out of the larger piece or use pliers to break off bits and pieces that do not come off even after repeated tapping.

Patience is the key when cutting glass for stained glass windows since haste will indeed make waste - usually in the form of fissures and cracks in the midst of a shape. A glass grinder will serve to remove imperfections or to gradually reduce the size of a cut that might have been too large. Ensure that the edges of the individual pieces are smoothed using emery paper.
Connect the pieces of your stained glass windows by leading.

You need: lead strips, cutter


As each piece of your soon to be stained glass windows is now smooth all the way around, you can lay out the pieces like a jigsaw puzzle. Since the numbers on them will correspond to the numbered original pattern, this should present no problem. Once the puzzle is complete and each piece is in place, remove the adhesive and paper carefully and discard.

Use thin strips of lead and very carefully fit one around each piece of glass. Remember that the thickness of these strips will show up in the finished work and you need to be clear ahead of time if you desire thick borders or next to invisible ones!

Complete the process by soldering the joints.

You need: soldering iron, rolls of solder

This is a crucial step in the creation of your stained glass windows and it requires a clear work surface that is not flammable. Using the soldering iron, heat the solder and connect the leaded pieces of glass by soldering the joints. While you do not want to rush, you do need to work quickly to prevent solder from hardening before the pieces are properly fitted.

When you are finished with one side, remember to turn your stained glass windows over and then solder the other side! This step is often missed by newbies and results in water damage and instability of the finished product. Additionally, remember to solder around the outside of the window itself to ensure that all pieces stay in place.

Once the process is finished, you may clean your window with a mild dish detergent and polish it for installation or display.

If you are enjoying reading this blog,Share it on Facebook, Twitter, Buzz or Reddit.

Easy Stained Glass Christmas Holiday Lights

Easy Stained Glass Christmas Holiday Lights
Create very nice looking decorative lights that resemble stained glass or rock candy using some inexpensive common materials. You will need a pack of small clear plastic disposable picnic cups, A few different colored sheets of tissue paper, a bottle or two of 3D paint, a small strand of 10 or so clear miniature lights, and a small bottle of Mod Podge Gloss Lustre waterbase sealant. This sealant is commonly used in schools, crafts, etc. for different projects and is easily found in most craft stores. An 8 oz bottle will go a long way and costs just a few dollars. You will also need a scissor, 1/2 inch paint brush, a hobby knife, and a cheap soldering iron. The picture shows the materials needed and


step 1X Marks the spot!
Gather your materials needed and plug in your soldering iron. Using the soldering iron tip, melt five holes into the bottom of a plastic cup, forming a pattern similar to the 5 shown on a dice. The mark in the picture is to show you the pattern, but you don't want to mark your cups since the marks will show when your project is finished. Then using the hobby knife, s…

step 2Apply the Tissue
You may want to lay some old newspaper down to keep your worksurface clean. Cut or rip some of each color tissue paper into 1/2 to 1 inch strips as desired. Some tissue will rip uniformly in one direction for a soft torn look. Use the tissue as strips, or cut into squares, or small shapes, or whatever else you imagine. Now using the 1/2 inch brush, apply the Mod Pod…

step 3Apply the Paint
Once the Mod Podge is dry, use the 3D paint to trace the joints on your stained glass, or outline your patterns, write messages, etc. Use gold for a nice Christmas look, or gray for stained glass "lead". Allow the paint to completely dry before touching it so you don't smudge your lines.

step 4Finish Up
Once all your cups are finished and dry, unwind your lights and gently press one light through the center hole in the bottom of each cup until only the wire is going through the hole. As you can see the lights on my strand were close together, you can find different strands that are spaced further apart if you wish. Allow each cup to hang from the wire strand, and han…

If you are enjoying reading this blog,Share it on Facebook, Twitter, Buzz or Reddit.

Make fake stained glass with hot glue, plexiglass, and paint! Cheap, easy, and pretty.

Supply list:
Hot Glue Gun
Black Hot Glue
Glass Paints
Paper
Thick Marker
Tape
Plexiglass (you can use glass, but it is heavy!


step 1Black Hot Glue
I found it online and have only used this brand so far. It is more expensive than regular hot glue. A 5 lb box costs about 50 dollars. Looks like it's main purpose is to attach weaves at beauty salons.

step 2Make your design
Draw your design on a sheet of paper with a fat marker. You want to use a fat marker because if you can't make the detail with a fat marker then you won't be able to make it with a thick stream of hot glue either. Once the design is complete roll some tape and put it on the front of your design.

step 3Tape design and begin drawing with hot glue
Tape your design to the back of your plexi glass. Begin to draw on the front of the glass with your black hot glue. The hot glue really likes sticking to the plexi glass so get comfy drawing with the hot glue on a test piece of paper first. You can scrape the hot glue off of the plexi glass, but it is a bit of work.


step 4Remove design
Done tracing the design! I've removed the paper from the back. I also used a piece of glass for the eye. Using glass stones can get some really cool looks. I glued the glass on with clear hot glue then drew around it with black. That way it wouldn't shift around while I worked.

step 5Add color
Bust out the paints and begin coloring!

step 6Let paint dry
Voila, stained glass Charr head! This picture has only a single layer of glass paint. It looks okay, but for better colors and less paint brush streaks do several layers of paint.

If you are enjoying reading this blog,Share it on Facebook, Twitter, Buzz or Reddit.

How to Paint on glass with Acrylics

How to Paint on glass with Acrylics

If you are enjoying reading this blog,Share it on Facebook, Twitter, Buzz or Reddit.

Painting Glass: Watch for Distortion


remember: objects seen through a glass are distorted. It can be hugely, as here, or just slightly. Observe closely, and get the distortion into your painting. Rather exaggerate it, than underplay it. But without it, the painting won't feel 'right'.

If you are enjoying reading this blog,Share it on Facebook, Twitter, Buzz or Reddit.
Painting Glass: Green Watercolor Version


This is a digital watercolor created from the photo of the glasses with the green plate behind them. Again, you can see there is no single color for glass, it's influenced by what's around it, light, and shadow.

When painting it, don't first paint the green background and then paint the the glasses on top. Paint all the elements simultaneously. So paint the green bits of the plate, the green parts of the glass, the green bits in the glass stems at the same time. The yellow liquid, the yellow reflection in the glass, and the yellow in the plate at the same time.

Look at the colors in the whole composition, see them as shapes and paint them individually, rather than painting the objects one at a time. Initially it may look like a chaotic mess, but keep at it and the shapes will all slot together to make a whole, like a jigsaw puzzle. You can then add in the tiny shapes of color, such as the highlights.

If you are enjoying reading this blog,Share it on Facebook, Twitter, Buzz or Reddit.
Painting Glass: Orange Watercolor Version


This is a digital watercolor created from the photo of the glasses with the orange plate behind them. Compare it to the green version and you'll see that there isn't 'one color' for glass. There are shapes of similar colors in both paintings, such as the bright highlights and the dark shadows on the edges, but the 'color' of the glass is determined by what is around it.

Also note the colors of the shadows. Painting a shadow doesn't simply mean you put some black on a brush and dab it down. Shadows have color (for more on this, read What Colors are Shadows?).

"But there are bits that are black", I hear you say... Well, I still wouldn't paint them with black from a tube. I'd mix the darkest orange/red I'd used in the painting with a dark blue (its complementary color), such as Prussian blue, as this gives a much more interesting dark.

If you are enjoying reading this blog,Share it on Facebook, Twitter, Buzz or Reddit.
Painting on Glass: Green Background


These are the same two glasses as in the first photo, but with a green plate behind them. As with the orange background, the 'color' of the glasses changes significantly. Even the color of the liquid in the rear glass is different.

For me glasses are a good example of why, if you're wanting to paint in a realistic style, you should paint from observation, not your imagination. You are simply unlikely get enough of it 'right', to have all the small details that will make it real. It's hard enough overriding your brain's autopilot instincts with the objects in front of you!

Start by setting up the glasses so they're in a consistent light (not one that changes; a lamp may be helpful) and take the time to look at them before you start to paint. When you think you're ready, mix three tones -- a light, medium, and dark. (These can be any color, it's the tone that's important.)

Now do quick tonal painting or study with just these. You're not trying to create a finished painting, just a rough sketch putting down the shapes or areas you see as light, medium, and dark, in tone. (If you're using watercolor, consider using masking fluid to preserve the lightest tones.)

When you're done, step back so you can see both your tonal study and the glasses. Spend some time comparing the two, then adjust and refine your tonal sketch as necessary.

If you are enjoying reading this blog,Share it on Facebook, Twitter, Buzz or Reddit.

Painting Glass: Orange Background


The color of a glass is influenced by what's in the background. These are the same two glasses as in the previous photo, but with a orange plate behind them. Compare the two photos and you'll see how the 'color' of the glasses change.

Notice how the colors in the stems of the glasses are influenced too. There are oranges in all sorts of places, including shadows and edge closest to you.

If you are enjoying reading this blog,Share it on Facebook, Twitter, Buzz or Reddit.

Painting on Glass: choose your color


There is no single color or paint that could be labelled 'transparent glass'. The color of a glass is determined by what's around it, what you see through it, what is reflecting in it, and how much shadow there is.

The two glasses in this photo are both simple, transparent glass. The one at the front is empty and the one at the back has liquid in it. Now your brain knows that the color of the glass at the back hasn't changed, it's the liquid in it that's making it a different color. But to turn it into a painting, you don't first paint the glass itself and then what's in it.

You're creating an illusion. You need to suspend your brain's interpretation of the objects and look at the colors and tones. Paint each little shape or bit of color and tone individually and, like a jigsaw puzzle, the pieces will snap together to form the whole.

If you are enjoying reading this blog,Share it on Facebook, Twitter, Buzz or Reddit.
Twitter Delicious Facebook Digg Stumbleupon Favorites More